This is part one of our series on using Google Tag Manager to boost sales and conversions for eCommerce stores. To start, we’ll be touching on several uses of popups that can be quickly made with Tag Manager without bulky plugins, addons, or services. This quickstart guide will assume that you’re somewhat familiar with Google Tag Manager (GTM). If you aren’t, here’s a quick summary that GTM can do in regards to eCommerce.
By Using Google Tag Manager For eCommerce Stores, You Can:
- Track and analyze customer behavior to find pitfalls or design flaws
- Implement popups, banners, slide-ins, and call to actions based on conditions
- Split test different design layouts, colors, or wording on crucial pages like Cart or Checkout
- And so much more without the need for expensive (and often slow) developers or paid plugins.
One of the best features of GTM is that you can get as simple or complex as you want without much hassle and barely any coding knowledge required. Let’s start simple and overview conditional popups that could display a promo or coupon code.
Example One: Flash Sale Popup Notification
Let’s say your team suddenly becomes overstocked on a certain product and you need some quick sales. Your developer might take a day (if they even answer the phone- no offense to developers!) and you want to drive sales as soon as possible. Before we begin, we are also assuming you have Google Tag Manager setup and installed. If you don’t, it only takes 10 minutes- click here to get started. We will be using a Javascript package called SweetAlert2, which allows anyone to build beautiful, responsive and customizable popups. Add the sweetalert2 script in the header of your website- above the Google Tag Manager Script.
<script src=”//cdn.jsdelivr.net/npm/sweetalert2@11″></script>
Next, head to Google Tag Manager and let’s get started. Create a new Tag and choose custom HTML type. This is the basic template for a sweetalert2 popup which we will be using for demonstration:
<script>
Swal.fire({
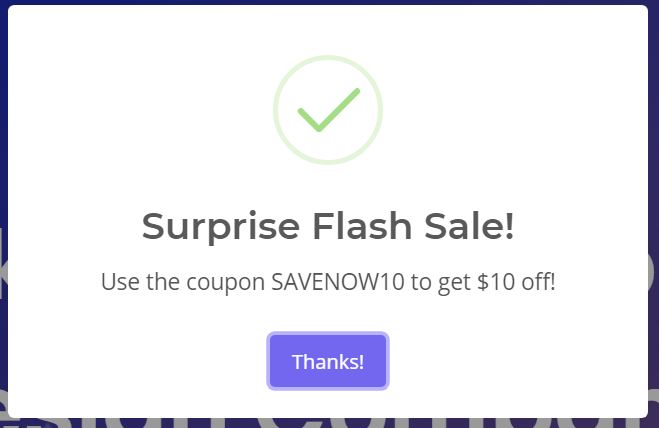
title: ‘Surprise Flash Sale!’,
text: ‘Use the coupon SAVENOW10 to get $10 off!’,
icon: ‘success’,
confirmButtonText: ‘Thanks!’
})
</script>

Our example popup template using Google Tag Manager
The layout is simple enough, “title”, “text”, and “button text”, along with built-in icons you can use (success, warning, error, info). You can get as creative or granular as you want with the trigger for this popup tag. For the sake of simplicity, let’s have this trigger on a specific product page related to the flash sale. Keep in mind that we don’t want the popup to be intrusive, so we’ll limit how many times per session it will trigger.

The GTM Popup in action
Add a trigger to the tag “Page View” and check the “some page views” option. We will add two triggers, and if both conditions are met, the popup will appear. The first trigger being the product page URL that is related to the flash sale. The second trigger is “On screen duration” which we set to 10 seconds.

Trigger conditions for our popup
To make things simple in this first guide, we will use the “On screen duration” trigger to limit the popup per user as much as possible. Ideally you would want to set a cookie with GTM so that you could limit the popup once per session/user, but we’ll cover that in the next guide.
Once you’ve done the above, push the changes live and now you have a simple, non-intrusive popup that could help you boost sales in under 10 minutes. This quickstart guide is a proof of concept and shows that you can quickly add a conversion-driving feature with Google Tag Manager.
Our Part 2 will cover more detailed and real-world examples containing real case study data that you can implement on your eCommerce store. We will discuss more detailed behavioral targeting, including displaying offers based on traffic acquisition sources, prevent flow exit rates with conditional call to actions and more.

Co-founder Custom Design Partners
Alexander Hatala is the co-Founder at Custom Design Partners. He specializes in e-Commerce operations, performance marketing strategies, and behavioral analytics.


